Setting up an adblocking VPN with Pi-hole
homelab
Ads are annoying, yet they are becoming increasingly more ubiquitous, or at least they are trying. With the recent deprecation of Manifest V2 in Google Chrome et. al. they are trying to force more and more advertisements through our eyes. But what if I told you that you can have the equivalent of the webrequest-api of manifest V2 but everywhere… You take the blue pill - the story ends, you continue using Firefox and uBlock. You take the red pill - you begin your journey into home labs and networking.
The Backstory
So, I had this old computer laptop from school from a few years ago that I have always wanted to repurpose for something. Just a Celeron chip and 4 GB or RAM. However, after seeing many homelab videos I have decided to give it a try, and set myself to do anything with it, doesn’t matter if it’s a NAS or a VPN or whatever.
Out of all the uses that I saw, the one that seemed the most useful to me was repurposing it as a Pi-hole, something magical that somehow blocked ads in your whole network forever. And so, I committed to it, and after a few days and many, many head bumps against the wall I got it working. This is how I did it and how it works, so that hopefully you can understand what you are doing and have a smooth experience.
The Outline
Pi-hole
What even is Pi-hole? Well, it’s a DNS server that blocks ad serving domains. The neat part about it is that it’s extremely customizable and easy to implement (if you are not a moron like me). This, when combined with a VPN like Tailscale that allows you to connect to them from anywhere in the world easily, means that you have something like uBlock Origin anywhere and everywhere.
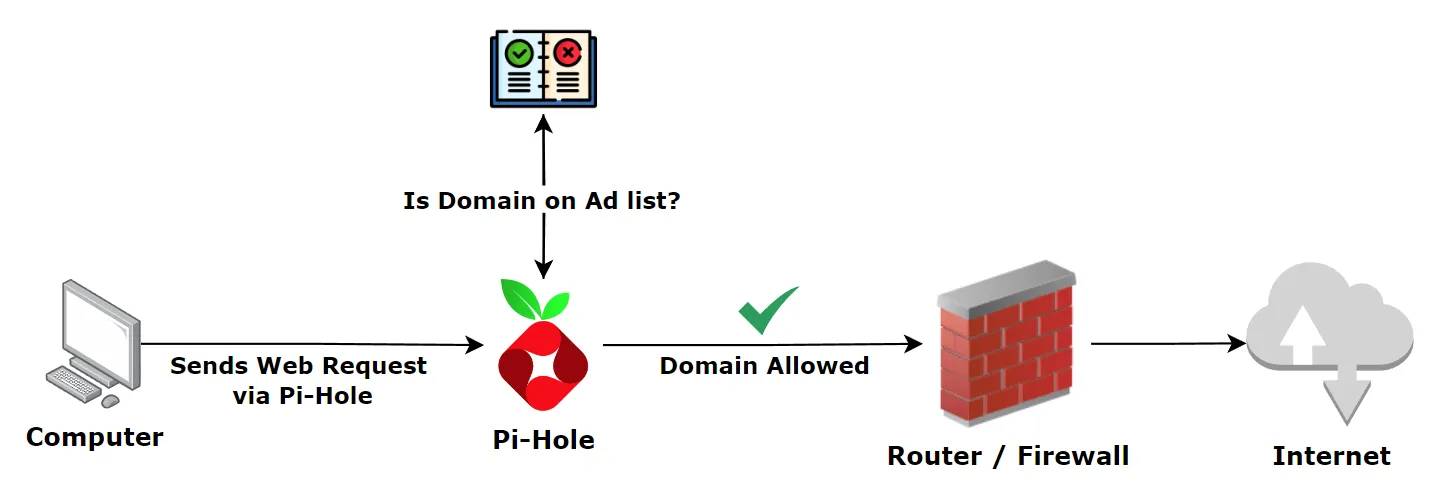
Below is a really simple diagram of how Pi-Hole works:

So, as it can be seen, when you request anything to the internet it will pass through the Pi-hole. There it has a blacklist of domains that are known to be malicious or contain ads, but you can customize it as you want. This is where the DNS part comes into play. Pi-hole acts as a DNS because it looks up if the domain is part of the IP addresses blocked and if so, it doesn’t let it pass through to the internet, and it then uses the DNS from whatever default DNS provider you are using.
However, you can set up your Pi-hole so that when it doesn’t know the IP of one domain it can ask one of the default providers and then it will receive it back at cache it, so that the next time, you don’t go through the DNS providers but rather you go directly to the server or the authoritative domain server. I haven’t set this up yet, however, I’m looking forward on implementing it in the future.
If you find this useful, consider subscribing to the RSS so that you get the update and maybe even see some of my home lab projects! Also, if you have any corrections, let me know through my email or discord and I will try to fix them as soon as possible.
How to Set Up
Installing the OS
For this I decided to install Ubuntu Server LTS because it was the most widely used OS for servers. As for the installation I used Ventoy as it’s easy to use and allows me to have multiple ISOs in one USB-stick.
What you will need:
-
Computer
-
Disposable USB-stick of at least 4 GB
I’m sure you can figure out how to google: “install ubuntu server LTS” but regardless here is the link: https://ubuntu.com/download/server
Meanwhile that is downloading install Ventoy from: https://www.ventoy.net/en/download.html
Once Ventoy finished downloading, extract it (optional). Put the usb-stick into your computer. Run Ventoy2Disk.exe from inside the extracted folder.
Once the Ubuntu ISO has finished downloading, copy it inside of the usb-stick, which should be empty.
Now you’re ready to boot into Linux.
On the computer that you want to install it to put the usb in one of its ports. Shut down the computer. Wait 10 seconds, I do this just in case. Open, and immediately start spamming the Boot Menu button. You will need to look up which button it is for your computer.
This can take several tries, especially if you are pressing the wrong button lol (it happened to me). A menu should appear, there just select the one that resembles the most something to do with the brand of your USB stick or Ventoy.
If it doesn’t work, do the same but with the BIOS/UEFI button. In there, change the boot options so that the USB stick is placed at number 1 option. Then apply changes and restart.
Congratulations, now you are at the installer of Ubuntu. Follow the defaults until you get to configuring the internet connection.
Setting a static IP Adress
Once you are at the menu of configuring the network, you should edit it and select edit IPv4.
There you should change the configuration from DHCP to Manual.
It will ask for a Subnet, Adress, Gateway and Name Servers. You can leave Name Servers blank. As for the rest here’s what you should put:
| Field | Value |
|---|---|
| Subnet | 192.168.0.0 |
| Adress | 192.168.0.xxx |
| Gateway | 192.168.0.1 |
Change “xxx” with whatever number you want. I would choose something small and memorable like 69, because remember the address will be static and therefore it will stay like this forever (until you change it).
Then you just complete the installation and follow all the defaults.
When asked which packages to install just ignore it. And when asked for a server name just pick something cool.
After some time, you will be asked to remove the usb-stick and reboot and then you’re done!
From now on I would recommend managing the server through SSH, and for that just run on the server:
sudo systemctl enable ssh

sudo systemctl start ssh
The first command will start ssh on startup and the other one will start it.
Then in your other, hopefully more powerful computer, open the terminal and run:
ssh "yourServerUsername"@"yourServerIPAddress"
Setting up Pi-hole
Installing Pi-hole is very easy. Just run:
curl -sSL https://install.pi-hole.net | bash
or any of the options at the official docs: https://docs.pi-hole.net/main/basic-install/
You will then see a very straightforward installer which you again read everything, google everything that you don’t understand and follow with the defaults.
Configuring Tailscale
On the server first install Tailscale with:
curl -fsSL https://tailscale.com/install.sh | sh
Always remember to use regularly to keep packages up to date:
sudo apt update

sudo apt upgrade
Then, enable Tailscale:
sudo systemctl enable --now tailscaled
Afterwards, login into it by running:
sudo tailscale up
This is where SSH saves your butt because you can run this from your other computer that will actually have a GUI and a web browser, and so you can login or sign up for tailscale.
After that, you should arrive at your tailscale admin page (https://login.tailscale.com/admin) where you should see your server there.
There, set the expiration key to never expire. It should be one of the dropdown options when you click the three dots on the far right of the row of the server.
You should check it’s IP address and check if it’s whatever you set it up to be. Copy it and then go to the DNS tab in your admin page. It should be above at the right. Otherwise, just go here: https://login.tailscale.com/admin/dns
Afterwards scroll down to “nameservers” and add a custom one. Paste the IP of your server there. Then turn on the toggle at the right of “global nameserver” that says “override local DNS”, this will make it so that the DNS that your machines use is the one from the Pi-hole.
Now you are finally done!
Then, log in to your Tailscale account with all your machines and connect to the server. You now have a local ad-blocking VPN!
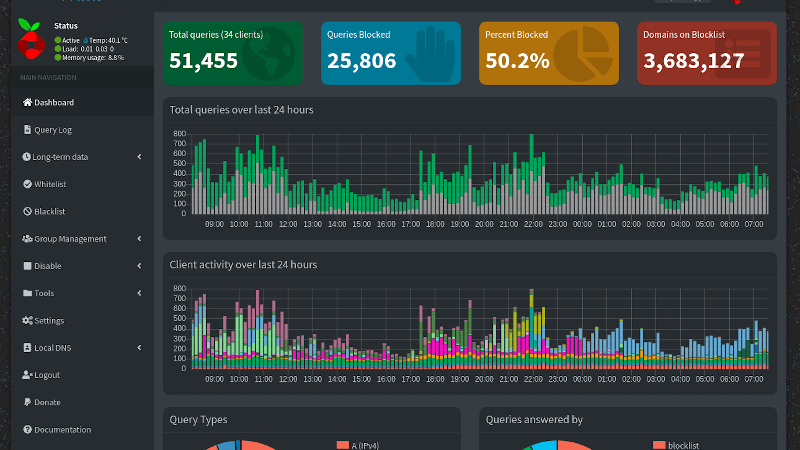
If you ever get fancy and want to check the stats or configure Pi-hole, just go to http://pi.hole/ or to http://yourserveripaddress/admin from any of your devices.

Conclusion
In this blogpost we learned the basics of how Pi-hole and Tailscale works and how you can set up a VPN that can block ads from anywhere. It’s a relatively straightforward process if you put aside one afternoon to do it and follow a coherent tutorial. I hope that this helped, and I will see you again in my next home lab update!